How to String a Fishing Pole for Beginners. This may seem like a simple task, but it is a crucial step in preparing for a successful fishing trip. Stringing your fishing pole properly can help you avoid line twists and tangles, which can make your fishing experience frustrating.
In this article, we will provide a step-by-step guide on how to string a fishing pole for beginners. We will cover everything from assembling your rod and reel to attaching the hook or lure. Whether you are a first-time angler or looking to improve your skills, this guide will help you string your fishing pole with ease.
I’ve been an outdoor enthusiast and fishing guide for over a decade, fishing in different terrains, weather conditions, and for various group sizes. My extensive hands-on experience has provided me with unique insights into what makes fishing tips truly stand out.
Key Takeaways
- Stringing a fishing pole is a crucial step in preparing for a successful fishing trip.
- Learning how to string a fishing pole can save you money and allow you to customize your setup to your preferences.
- Follow our step-by-step guide to string your fishing pole with ease.
How to Assemble Your Rod and Reel

Before you can start stringing your fishing pole, you need to assemble your rod and reel correctly. Assembling your fishing gear is an essential step in ensuring a successful and enjoyable fishing experience. Here’s how you can do it:
Parts of a Fishing Rod
A beginner’s fishing rod consists of several parts, including the handle, the butt, the ferrules, the guides, and the tip. The handle is the part of the rod that you hold, and it can be made of cork, foam, or rubber.
The butt is the thicker part of the rod that rests against your body when you’re fishing. The ferrules are the metal connectors that join the sections of the rod together.
The guides are circular rings that run along the length of the rod and help guide the fishing line. The tip is the thinnest and most flexible part of the rod, and it is where you attach the fishing line.
Types of Fishing Reels
There are three main types of fishing reels: spinning reels, baitcasting reels, and spin cast reels. Spinning reels are the most popular type of fishing reel and are easy to use. Baitcasting reels are more advanced and offer greater accuracy and control. Spincast reels are ideal for beginners and are easy to use but offer less control and accuracy.
Connecting the Rod Sections
To connect the rod sections, you need to align the male and female ferrules and gently twist them until they fit snugly. You should avoid forcing the sections together, as this can damage the rod. Once the sections are connected, you should give them a gentle tug to ensure that they are secure.
Attaching the Reel to the Rod
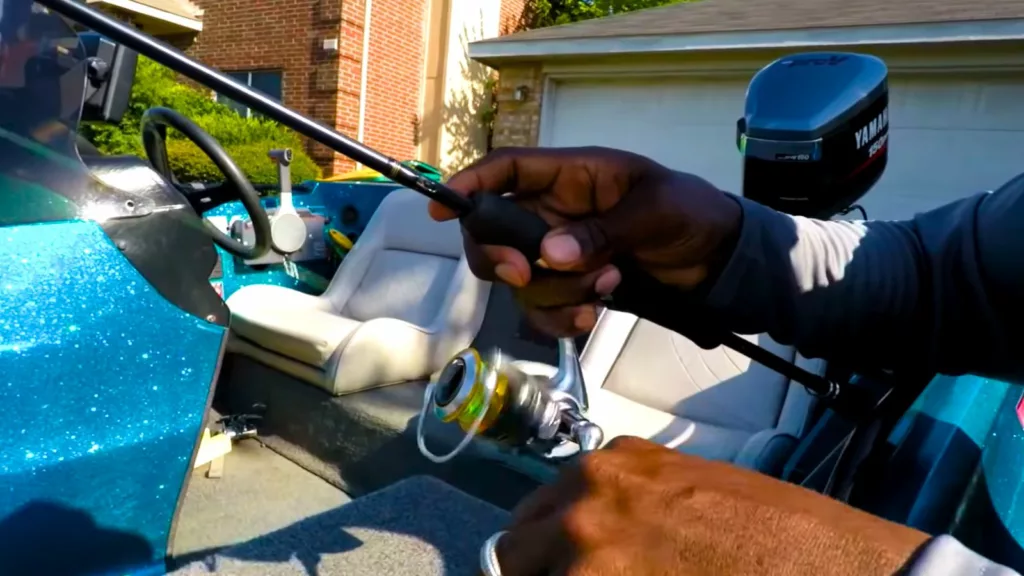
To attach the reel to the rod, you need to insert it into the reel seat and tighten the locking ring or screw. The reel seat is the part of the rod where the reel is attached, and it is located above the handle. You should ensure that the reel is securely attached to the rod before you start fishing.
Choosing the Right Rod and Reel Combination
Choosing the right rod and reel combination is essential for a successful fishing trip. You should consider the type of fishing you’ll be doing, the size of the fish you’re targeting, and your personal preferences. For example, if you’re fishing for small fish in a pond, a spinning rod and reel would be ideal. However, if you’re fishing for larger fish in the ocean, a baitcasting reel and rod would be more suitable.
By following these steps, you can assemble your fishing gear correctly and ensure that you’re ready to start stringing your fishing pole.
How to Thread the Line Through the Guides

Now that you have attached your reel to the rod, it’s time to thread the line through the guides. This is an essential step in stringing a fishing pole, and it’s crucial to do it correctly to avoid tangling or twisting the line.
Before starting, let’s review the different types of fishing lines available. There are four main types: monofilament, fluorocarbon, braided, and fused. Each one has its advantages and disadvantages, so it’s essential to choose the right one for your fishing conditions and preferences.
When selecting your fishing line, consider factors such as strength, diameter, visibility, abrasion resistance, stretch, and memory. For example, if you’re fishing in clear water, you may want to use a low-visibility line like fluorocarbon. If you’re targeting big fish, you may need a stronger line like braided.
Once you’ve chosen your fishing line, it’s time to thread it through the guides. Start from the tip of the rod and work your way down to the reel. Here are some tips to help you avoid twisting or tangling the line:
- Keep tension on the line as you thread it through the guides.
- Use a line spooler or a helper to keep the line straight and taut.
- Check for kinks or knots in the line before threading it through the guides.
It’s also essential to ensure that the line goes through each guide correctly. If the line doesn’t go through the guides correctly, it can cause tangles or even breakage.
With these tips in mind, you should be able to thread the line through the guides easily and quickly. Remember to take your time and be patient; soon you’ll be ready to start fishing!
How to Tie the Line to the Spool

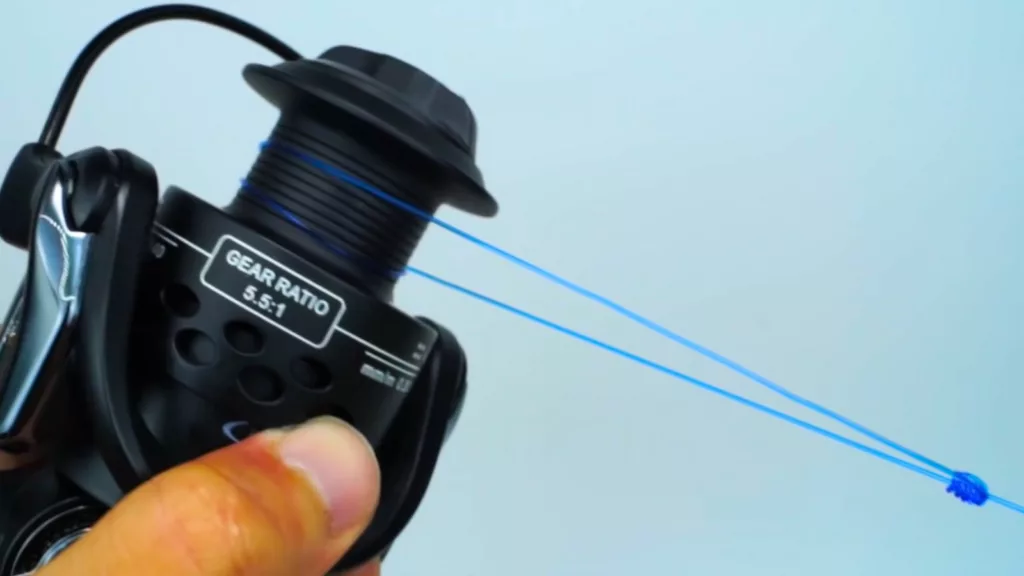
The third step in stringing a fishing pole is to tie the line to the spool of the reel. Different types of knots can be used to tie the line to the spool, such as an arbor knot, a clinch knot, or a uni knot. Here are some tips on how to tie a secure and neat knot that will not slip or unravel.
Arbor Knot
To tie an arbor knot, start by making an overhand knot at the end of the line. Then, pass it through the hole in the spool and wrap it around the spool once. Make another overhand knot above it and tighten both knots. This knot is easy to tie and it will prevent the line from slipping on the spool.
Clinch Knot
To tie a clinch knot, pass the end of the line through a small loop or ring on the spool. Then, wrap it around itself five times and pass it back through the first loop. Finally, pull it tight and trim off any excess line. This knot is strong and easy to tie, but it may not be suitable for heavier lines.
Uni Knot
To tie a uni knot, make a loop with about six inches of line near its end. Then, pass it through a small loop or ring on the spool and wrap it around itself six times inside its loop. Pull it tight while sliding it down towards the spool and trim off any excess line. This knot is versatile and strong, and it works well with braided lines.
No matter which knot you choose, make sure to tie it tightly and neatly. A loose or messy knot can cause problems when casting or reeling in your catch. Take your time and practice tying knots until you can do it quickly and confidently.
How to Wind the Line onto The Reel
The fourth step in stringing a fishing pole is to wind the line onto the reel by turning its handle. This step is crucial because it determines how many lines you will have available for casting. The amount of line you should put on your reel depends on its size and capacity.
To wind the line onto a spinning reel, hold it between your fingers with slight tension while turning its handle clockwise until it is about 1/8 inch from the spool’s edge. For baitcasting reels, please hold the line between your fingers with slight tension while turning its handle counterclockwise until it is about 1/16 inch from the spool’s edge.
For spin cast reels, please hold the line between your fingers with slight tension while turning its handle clockwise until it is about 1/4 inch from the spool’s edge.
It’s essential to avoid overfilling or underfilling your reel with a line. To do this, you can check the manufacturer’s recommendations, use a filler spool or backing line if needed, and stop when you hear a clicking sound or feel resistance.
- Make sure the line is evenly distributed across the spool to avoid tangles
- Use a line conditioner to help the line lay smoothly on the spool
- Don’t wind the line too tightly onto the spool, as this can cause it to dig into itself and create tangles
- If you’re using a braided line, use a mono or fluorocarbon backing to prevent slippage on the spool
- Always check the line for twists and tangles before casting
Here are some additional tips to help you wind the line onto your reel correctly:
By following these tips, you’ll be able to wind the line onto your reel like a pro and avoid any issues that may arise when casting.
How to Attach The Hook or Lure
Now that you’ve strung your fishing pole, it’s time to attach the hook or lure of your choice to the end of the line. Many different types of hooks and lures can be used for fishing, such as single hooks, treble hooks, jigs, spoons, spinners, crankbaits, soft plastics, and flies. So, how do you choose the right one for your fishing situation and target fish?
First, consider the type of fish you want to catch. Different fish species have different feeding habits and preferences, so you’ll need to match your hook or lure to their behavior. For example, if you’re targeting bass, you might want to use a crankbait that imitates a small fish or a spinnerbait that creates vibrations and flashes to attract their attention.
Next, think about the size, shape, color, action, and presentation of your hook or lure. These factors can affect how well the fish will bite and how likely they are to get hooked. For example, a small jig with a soft plastic trailer might work well for finesse fishing, while a large topwater plug might be better for aggressive surface strikes.
Once you’ve chosen your hook or lure, it’s time to attach it to the line. There are several knots you can use, such as a Palomar knot, a trilene knot, or a snell knot, depending on the type of hook and line you’re using. For lures, you can use a loop knot, a Rapala knot, or a clinch knot to create a secure connection.
To tie a strong and reliable knot, make sure to wet the line before tightening it, and pull the knot tight slowly and evenly. Check the knot for any twists or tangles, and trim the excess line with a pair of scissors or pliers. With a little practice, you’ll be able to tie knots quickly and confidently, and catch more fish on your next fishing trip!
Final Thoughts
Congratulations! You have learned how to string a fishing pole like a pro. By following the steps outlined in this article, you can now customize your fishing setup, avoid line twists and tangles, and save money by restringing your fishing pole.
Remember to choose the right type of fishing reel and line rating for your fishing needs. Braided lines are great for strength and sensitivity, while fluorocarbon lines are invisible underwater. Make sure to use scissors or a knife to cut your line and electrical tape to secure the tag end.
Practice tying different fishing knots and experiment with different types of backing and ferrules to find the setup that works best for you. Don’t forget to close the bale arm and fill your reel to the proper capacity.
Now that you have mastered the art of stringing a fishing pole, it’s time to hit the water and catch some fish! Remember to be patient, stay focused, and enjoy your fishing adventure.
Frequently Asked Questions
What are the basic steps to string a fishing pole?
To string a fishing pole, you need to gather the necessary equipment, including a fishing rod, fishing reel, and fishing bait. Then, choose the right fishing line, determine its strength, select the appropriate length, and attach it to the reel. Finally, add tension to the line, fill the reel to the proper capacity, and close the bail.
How do you string a push-button fishing pole?
To string a push-button fishing pole, you need to press the button on the reel to release the spool and thread the line through the first guide on the fishing rod. Then, tie the line to the spool using an arbor knot, and close the bail. Finally, reel in the line to make sure it’s properly aligned with the guides.
What is the process of rigging a fishing pole?
To rig a fishing pole, you need to attach a hook, weight, and bait to the end of the fishing line. Then, cast the line into the water and wait for a fish to bite. When you feel a tug on the line, reel it in slowly and steadily to avoid losing the fish.
How do you set up a fishing rod for lake fishing?
To set up a fishing rod for lake fishing, you need to choose a rod and reel that are appropriate for the size of the fish you’re targeting. Then, select the right fishing line, bait, and hooks, and rig the fishing pole according to your preferences. Finally, cast the line into the lake and wait for a fish to bite.
What is the proper way to put a hook on a fishing rod?
To put a hook on a fishing rod, you need to tie a knot in the fishing line using a fishing knot, such as the Palomar knot or the Improved Clinch knot. Then, attach the hook to the knot and test it by pulling on the line to make sure it’s secure.
