

How to pitch a tent proficiently? It is a fundamental skill that can significantly impact the overall camping experience.
In this article, we will explore the importance of mastering the art of tent pitching and delve into the main benefits it brings. From providing comfort and protection to fostering a sense of accomplishment, pitching a tent skillfully is crucial for any camping adventure.
Setting Up a Tent

Now that we’ve established the significance of pitching a tent, let’s move on to the practical aspects. Regardless of the type of tent you have, the general steps and principles remain consistent.
Choose a Suitable Spot
The first step is selecting a suitable spot for your tent. Look for a flat, level, dry, and clear area away from potential hazards. Safety is paramount, so ensure there are no overhanging branches or rocks that could pose a threat.
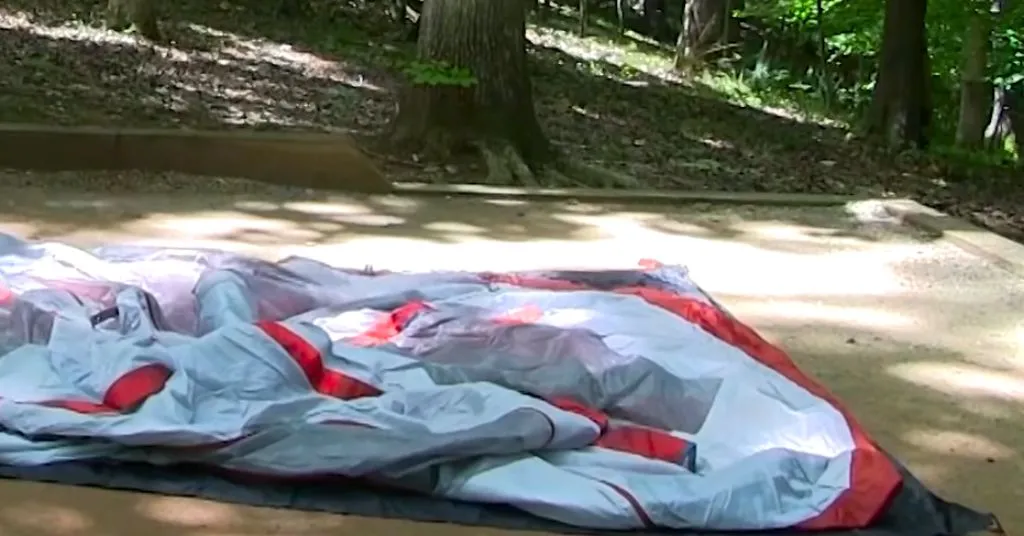
Lay Out the Tent
Once you’ve found the perfect spot, lay out your tent with careful consideration. Orient it correctly, making sure the door faces the direction you desire.
After laying it out, stake the corners firmly into the ground. This initial anchoring is crucial for the stability of your tent.
Assemble the Poles
Tents come with different pole structures, and it’s vital to follow the manufacturer’s instructions.
Most tents utilize color-coded systems, making it easier to match poles to corresponding sleeves or clips. Assemble the poles, ensuring they fit snugly and securely.
Insert the Poles
After assembly, insert the poles into the designated sleeves, grommets, or clips. Starting with the longest pole, work your way through the structure.
Proper insertion is key to maintaining the integrity of the tent’s shape.
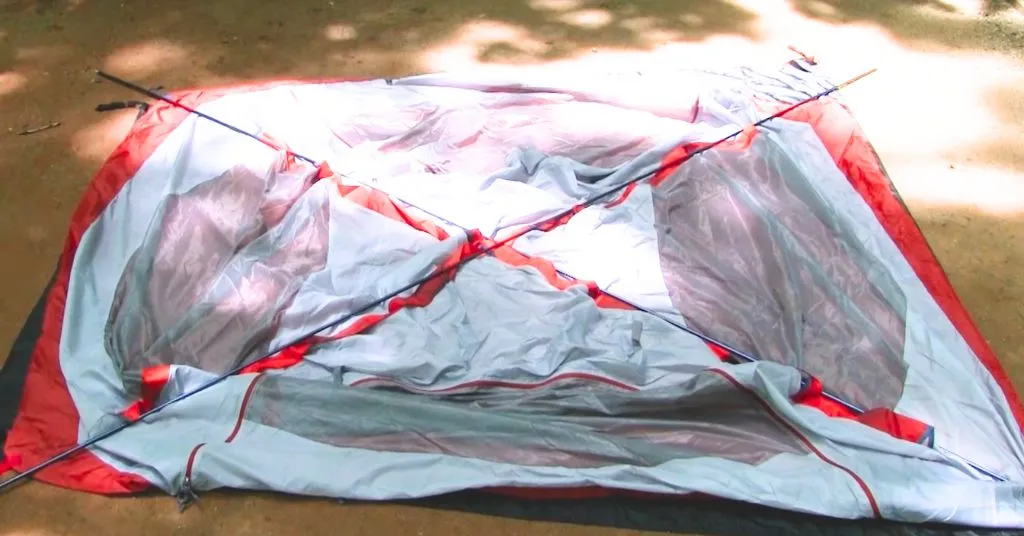
Raise the Tent
With the poles in place, it’s time to raise the tent. Lift the center of the tent and gradually adjust the poles until the structure stands tall. This step may require a bit of coordination, especially in larger tents.
Secure the Rainfly
The rainfly is your tent’s protective layer against the elements. Cover the tent with the rainfly and secure it by staking the guy lines. Ensure the rainfly is taut and evenly spaced to maximize its effectiveness.
Ventilate the Tent
Proper ventilation is essential for a comfortable camping experience. Open the vents and windows as needed, allowing a steady flow of fresh air. Adequate ventilation prevents condensation inside the tent and ensures a pleasant atmosphere.
Setting Up Different Types of Tents
How to Set Up a Dome Tent
Dome tents are popular for their ease of setup, stability, and versatility. The Coleman Sundome Tent serves as an excellent example, featuring a straightforward design with two poles, a rainfly, and a ground vent.
- Lay Out the Tent: Position the tent with the door facing your preferred direction and stake the four corners securely.
- Assemble the Poles: Begin assembling the poles and insert them into the sleeves or clips. Start with the longest pole and cross them over the top of the tent.
- Secure the Poles: Attach the poles to the grommets or hooks at the corners and raise the tent.
- Attach the Rainfly: Cover the tent with the rainfly and stake the guy lines, ensuring they are taut and evenly spaced.
How to Set Up a Cabin Tent
Cabin tents offer spacious accommodations, making them suitable for families or larger groups. The Core 9 Person Instant Cabin Tent, equipped with pre-attached poles, a rainfly, and a room divider, is a notable example.
- Lay Out the Tent: Place the tent with the door facing your desired direction and stake the four corners securely.
- Assemble the Poles: Start assembling the poles and insert them into the sleeves or clips, forming a rectangular or square frame.
- Secure the Poles: Attach the poles to the grommets or hooks at the corners and raise the tent.
- Attach the Rainfly: Cover the tent with the rainfly and stake the guy lines, ensuring they are taut and evenly spaced.
How to Set Up a SUV Tent
SUV tents are a specialized category designed to attach to a vehicle, extending the living space and comfort of the vehicle. The Napier Sportz SUV Tent, with a sleeve that fits most SUVs and trucks, a rainfly, and a screen room, serves as a prime example.
- Lay Out the Tent: Place the tent next to the vehicle and stake the corners securely.
- Assemble the Poles: Begin assembling the poles and insert them into the sleeves or clips, forming either a dome or cabin shape.
- Secure the Poles: Attach the poles to the grommets or hooks at the corners and raise the tent.
- Attach the Rainfly: Cover the tent with the rainfly and stake the guy lines, ensuring they are taut and evenly spaced.
- Attach the Sleeve or Tunnel: Connect the sleeve or tunnel to the vehicle, either by wrapping it around the rear hatch or sliding it over the roof rack.
Precautions While Pitching the Tent
Ensuring a successful camping experience involves being mindful of common mistakes and hazards while pitching a tent. Let’s explore some key precautions to take:
Avoid Choosing a Bad Spot
Selecting an appropriate camping spot is crucial. Avoid areas that are too close to water, fire, roads, cliffs, or trees. Assess the terrain for any potential dangers and opt for a safe, well-drained location.
Prevent Tent Damage
Handle your tent with care to avoid unnecessary damage. Avoid dragging it across the ground, stretching the fabric, or puncturing it with sharp objects. Proper care ensures the longevity and effectiveness of your shelter.
Secure Your Tent
One common mistake is leaving the tent unattended, unstaked, or unsecured. Even in seemingly calm weather, unexpected gusts of wind can jeopardize your tent’s stability. Always stake and secure your tent to prevent any surprises.
Avoid Getting Wet
Pitching your tent on wet ground or under dripping trees can lead to an uncomfortable and damp camping experience. Always assess the ground conditions and choose a well-drained area. Additionally, using a rainfly, even in clear weather, adds an extra layer of protection.
Regulate Temperature
Maintaining a comfortable temperature inside your tent is crucial for a good night’s sleep. Avoid pitching the tent in windy, shady, or exposed areas, as this can result in temperature fluctuations. Adequate insulation and proper ventilation help regulate the interior climate.
Mind Sun Exposure
While natural light is pleasant during the day, pitching your tent in direct sunlight without proper ventilation can turn it into an oven. Consider the sun’s trajectory and choose a location that provides shade or set up your tent with proper ventilation to avoid overheating.
Tips and Tricks for Effortless Tent Pitching
Practice Before You Go
Pitching a tent can be a daunting task, especially if you’re new to camping. To build confidence and efficiency, practice setting up your tent at home or in your yard. Familiarize yourself with the process and the various components before embarking on your camping trip.
Read the Instructions
Each tent comes with its own set of instructions and guidelines. Take the time to thoroughly read and understand the manufacturer’s recommendations for your specific tent model. This ensures that you’re aware of any unique features or requirements.
Work as a Team
Camping is often a communal activity, so why not collaborate on tent setup? Enlist the help of your camping buddies or family members to share the tasks and distribute the workload.
Final Thoughts
In summary, pitching a tent is a vital skill that can significantly enhance your camping adventures. Whether you opt for a dome, cabin, or SUV tent, following the correct steps and precautions will make your experience more enjoyable.
Pitching a tent like a pro ensures not only a comfortable night’s sleep but also contributes to the overall safety and security of your outdoor excursion.
Frequently Asked Questions
Why is it essential to choose a suitable spot when pitching a tent?
Choosing a suitable spot is crucial for several reasons. A flat, level, and dry surface ensures the stability of the tent, preventing uncomfortable sleeping conditions and potential damage. Avoiding areas close to water, fire, roads, cliffs, or trees enhances safety, shielding you from natural hazards and ensuring an enjoyable camping experience.
How can I prevent damaging my tent during setup?
To prevent damage to your tent, handle it with care. Avoid dragging it on the ground, stretching the fabric excessively, or puncturing it with sharp objects. Following the manufacturer’s instructions during assembly, using the correct stakes, and being mindful of surroundings contribute to maintaining the tent’s structural integrity.
Why is proper ventilation important when pitching a tent?
Proper ventilation is crucial for maintaining a comfortable atmosphere inside the tent. Adequate airflow prevents condensation, reducing the risk of a damp and clammy interior. Opening vents and windows ensures a steady exchange of air, creating a pleasant environment and enhancing overall camping comfort.
What are the benefits of practicing tent setup before going camping?
Practicing tent setup before your camping trip offers several benefits. It familiarizes you with the tent’s components, reducing the likelihood of fumbling or confusion during the actual setup. Practice helps you identify any missing or damaged parts, allowing time for replacements. Moreover, it builds confidence, making the actual setup in the wilderness smoother and more efficient.
How can I adapt to unpredictable weather conditions while pitching a tent?
Adapting to unpredictable weather is essential for a successful camping experience. Check weather forecasts before your trip and be prepared with appropriate gear. Choose a tent site strategically, considering wind direction, sunlight exposure, and potential rainfall. Having a rainfly ready, adjusting ventilation accordingly, and securing the tent adequately in windy conditions are crucial measures to adapt to changing weather conditions.