
There are steps to learn How To Set Up a Fishing Rod, and we have created them for you!
Hey there, fellow fishing enthusiasts! I’m Mukarim Zargar, your friendly camping and fishing expert. Today, I’m here to guide you through the art of setting up a fishing rod like a pro. Whether you’re a novice angler or someone looking to brush up on their skills in 2024, you’re in the right place.
Steps on How To Set Up a Fishing Rod
Let’s dive in and explore the secrets of assembling, threading, choosing lures, and more.
Assembling your Rod and Reel
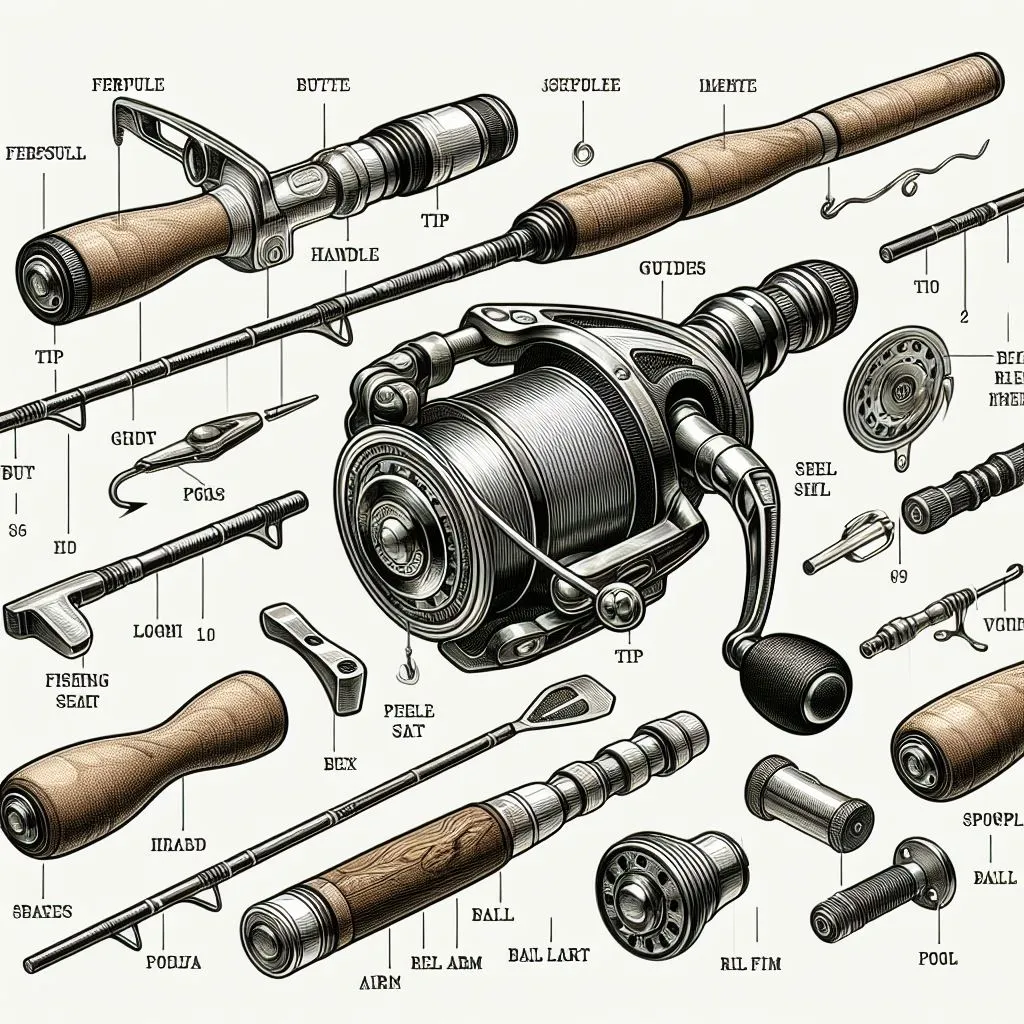
To start, let’s acquaint ourselves with the various components of a fishing rod and reel. From the ferrule to the tip, understanding each part is crucial. Don’t worry—I’ve got a handy diagram for you. But before you put it all together, give your gear a quick clean. Dirt and debris can cause damage and affect performance. Now, let’s connect that reel to the rod securely. Remember, it’s a balance—tighten, but don’t overdo it!
Threading your Fishing Pole
Threading your line through the guides may seem simple, but it’s a step that can make or break your cast. Choose the right type and size of fishing line—braid, monofilament, or fluorocarbon. Spool it onto the reel evenly, avoiding twists and tangles. Threading through the rod guides, starting from the tip, requires finesse. A smooth line ensures a smooth catch.
Steps on Choosing a Lure
Now, to choose a lure follow these steps:
Step 1: Identify Your Fishing Environment
Determine the type of water you’ll be fishing in freshwater, saltwater, lakes, rivers, or ponds. Tailor your lure choice based on the specific environment to maximize success.
Step 2: Know Your Target Species
Identify the fish species you’re targeting. Different fish have varying feeding habits and preferences. Knowing your target helps in selecting a lure that mimics their natural prey.
Step 3: Understand Lure Types
Familiarize yourself with different lure types such as spoons, spinners, jigs, plugs, and soft plastics. Each type has unique characteristics that make it suitable for specific fishing scenarios.
Step 4: Consider Lure Action and Depth
Evaluate the action and diving depth of the lure. Some lures swim near the surface, while others dive deeper. Match the lure’s action to the fish’s behavior and the water depth you’re fishing in.
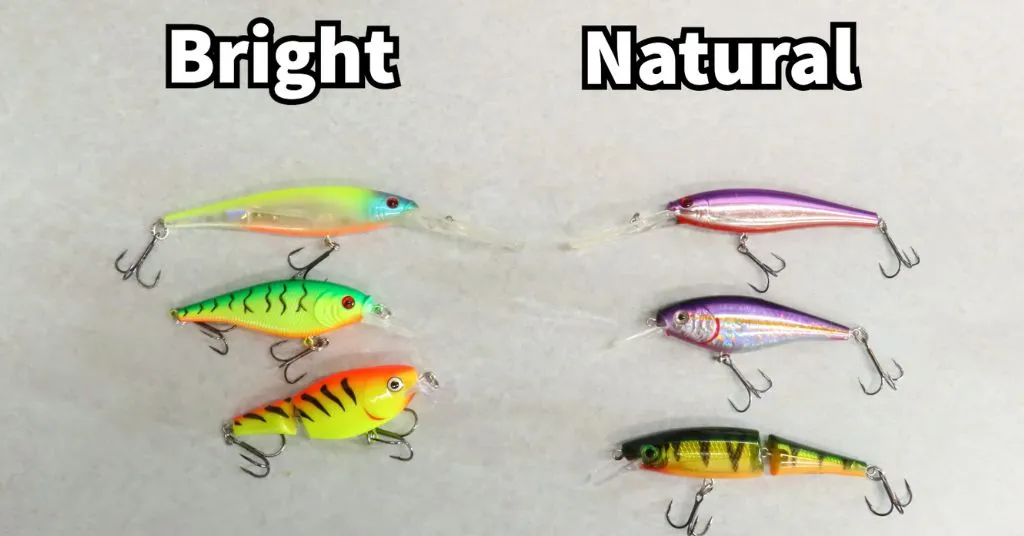
Step 5: Choose the Right Size and Color
Select the lure size based on the fish’s prey size and the conditions of the water. Consider the water clarity when choosing a lure color. Bright colors in murky water, natural tones in clear water.
Step 6: Assess the Fishing Conditions
Take note of weather conditions, time of day, and water temperature. Certain lures and colors are more effective in specific conditions. Adjust your choice accordingly for optimal results.
Step 7: Experiment and Observe
Once on the water, be willing to experiment with different lures. Observe how fish respond to your presentations. If one type isn’t working, switch it up until you find what triggers bites.
Step 8: Learn from Experience
Keep a record of your successes and failures with different lures. Over time, you’ll develop a keen understanding of which lures work best in various situations, enhancing your overall fishing prowess.
Steps on Attaching a Lure
Securing your lure properly is key to a successful fishing expedition. The right hooks, swivels, and knots make all the difference. Ever tried the improved clinch knot? It’s a reliable choice for attaching your lure securely. Before casting, always tighten, trim, and test your knot.
Step 1: Choose the Right Equipment
Select appropriate gear such as hooks, swivels, snaps, and leaders suitable for your lure and line. Skip unnecessary details, focusing on essentials.
Step 2: Identify the Type of Lure Attachment
Recognize the best method for attaching your specific lure—whether it’s a hook, swivel, snap, or leader. Keep it straightforward and to the point.
Step 3: Tie a Reliable Knot
Demonstrate tying a basic and reliable knot, like the improved clinch knot, for secure lure attachment. Highlight simplicity and effectiveness without unnecessary elaboration.
Step 4: Tighten, Trim, and Test
Emphasize the importance of tightening the knot properly. Provide tips on trimming excess material and testing the knot’s strength before casting. Keep the information concise.
Step 5: Ensure Secure Attachment
Reiterate the significance of attaching the lure securely to prevent loss or damage. Emphasize the key factors: proper equipment, appropriate knot, and thorough testing.
Step 6: Explore Alternative Knots (Optional)
Optionally, mention exploring different knots for specific scenarios. Be brief, directing readers to external resources for in-depth knot tutorials.
Step 7: Utilize Online Resources
Encourage readers to explore online tutorials or apps demonstrating various fishing knots and rigs for continuous learning. Keep the recommendation concise.
Step 8: Practical Application
Emphasize the practical application of these steps in real fishing situations. Encourage readers to apply and refine their knot-tying skills through hands-on experience.
Conclusion
Congratulations! You’re now armed with the knowledge to set up a fishing rod like a seasoned angler. Proper gear assembly, threading, lure selection, and attachment are your keys to success. Now, get out there, practice, and reel in those victories. I’d love to hear about your experiences or answer any lingering questions. Drop your thoughts in the comments or connect with me on social media. Thanks for joining me on this fishing adventure!
Frequently Asked Questions
How do I determine the right size of rod and reel for my fishing needs?
Selecting the correct rod and reel size depends on factors like the type of fishing you plan to do, the target species, and your personal preference. As a general rule, lighter gear suits smaller fish and finesse techniques, while heavier gear is ideal for larger species and heavier lures. Refer to the “Assembling your Rod and Reel” section for more insights.
What’s the purpose of adjusting the drag and brake on my reel, and how do I do it?
Adjusting the drag and brake settings on your reel is crucial for controlling the amount of resistance during a fish’s run and preventing line backlash. Too tight, and you risk losing your catch; too loose, and the line may tangle. The right settings depend on your fishing conditions and the fish species you’re targeting.
Can you provide tips for casting and retrieving my lure properly?
Absolutely! Successful casting involves a combination of technique and practice. Ensure your rod and reel are properly set up, and pay attention to your casting motion. When retrieving, vary your speed and use different actions to mimic injured prey. Check out the “Threading your Fishing Pole” section for additional insights.
How can I detect a fish bite, and what’s the best way to hook it?
Detecting a fish bite requires sensitivity to your rod’s movements and line tension. A sudden twitch or a subtle pull may indicate a bite. When you feel a bite, resist the urge to immediately set the hook. Instead, wait for a second pull or tension on the line before setting it. Learn more in the “Choosing a Lure” section.
What’s the proper way to land and release a fish safely and ethically?
Landing and releasing fish responsibly is essential for conservation. Use a landing net to avoid injuring the fish, and handle it with wet hands or gloves to protect its slime layer. When releasing, gently place the fish back into the water, supporting it until it swims away on its own. Discover more tips in the “FAQs” section.